The documentation for running cloudflared appears to be somewhat lacking and/or confusing to most people. It’s fine for people that are familiar with cloudflared and it’s inner workings, but for a newcomer, it’s a bit daunting.
Let’s step through getting it installed and configured, and then present an RDP session via cloudflared to be accessed remotely.
Overview
Cloudflare announced argo tunnels a while ago, but has recently pushed them further by allowing free usage of them for small business and personal use. By doing so, they’ve basically removed the need for port forwarding and even traditional VPN’s in most cases.
Say goodbye to old fashioned VPN’s, say hello to zero-trust!
To read more about the concept of “Zero Trust” - Cloudflare have written a pretty neat article about it, I’ll let them do the explaining… https://www.cloudflare.com/en-gb/learning/security/glossary/what-is-zero-trust/
Installation & Authentication
First, grab the 64-bit ZIP from here: https://developers.cloudflare.com/cloudflare-one/connections/connect-apps/install-and-setup/installation#windows
Extract the ZIP somewhere handy e.g. C:/temp or anywhere you can access.
Run powershell as admin and cd to the directory you extracted the cloudflared zip to (In my case, G:\Downloads).

First, test the tunnel with the following command.
.\cloudflared.exe tunnel
Browse to the link provided and you should be directed to a cloudflare error page and see some errors show up in powershell. This is good! This means the web request hit your machine but couldn’t go anywhere, since there isn’t a web server running (Unless you have one running on port 8080?).

Now that we know the tunnel works, we can set one up properly. To to this, we need to log into cloudflare to provide the cloudflared client with credentials. s
.\cloudflared.exe tunnel login

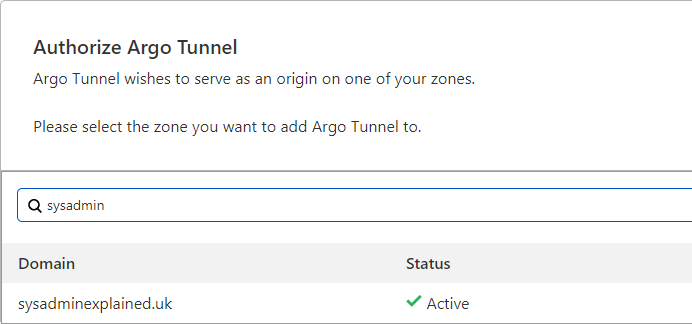
At this point, your browser should pop up and ask for a cloudflare login, log in as normal and it will take you to the screen shown below. Select the domain you want to attach it to and click Authorize.
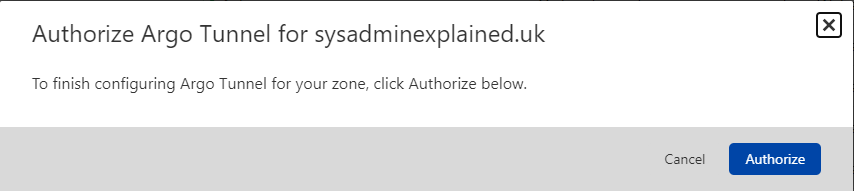
Once you’re done, you should see a success message in powershell and you’ll now have a cert.pem file saved. Keep this safe!

Tunnel Creation
Next, we need to create a tunnel and give it a name.
.\cloudflared.exe tunnel create mytunnel

Make a note of the tunnel ID and the location the json file is stored for reference later. You’ll need it for your config file!
You may also see a message that cloudflared needs updating, this is fine to ignore, we’ll address this later.
You can check the status of your tunnel(s) by running a list command
.\cloudflared.exe tunnel list

As you can see here, mytunnel has been created and has no connections currently. You can also see the status of any other tunnels e.g. ls02 shown here is currently connected to Cloudflares LHR (London Heathrow) and Dublin datacenters twice. Cloudflare tunnels automatically set up redundant connections to provide automatic load balancing and failover between Cloudflare endpoints, handy!
Tunnel Configuration
Cloudflared created a hidden folder in your C:/users/youruser folder which stores the configuration files for the tunnel once created. To start routing things to the tunnel, we need to create a config.yaml file with some rules to tell cloudflare what services are available on the tunnel. You can add web servers/services, RDP and SSH sessions currently.
You can also go a step further and present an entire subnet to cloudflared which can be used in conjunction with the warp client (a.k.a 1.1.1.1) on another device to VPN into your network via the tunnel, but that is for another guide!
To access this folder from powershell, you can use the following command. (Of course, replace it with your username as shown in the output after creating your tunnel above)
explorer.exe C:\Users\Adam\.cloudflared\
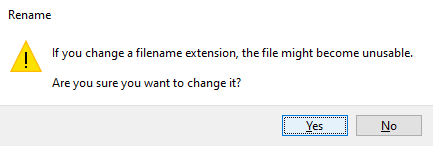
You need to create a file called config.yaml in here. To do this, you will need to enable file name extensions. Then you can right click and use new > Text Document and name it config.yaml, then click yes to the prompt shown.
To edit the yaml file, notepad is fine, but I’d suggest using VS Code or Notepad++ to ensure the formatting is correct and to help with syntax.
tunnel: 6607f8bc-6cd2-4667-b715-4148c705cbc9
credentials-file: C:/Users/Adam/.cloudflared/6607f8bc-6cd2-4667-b715-4148c705cbc9.json

ingress:
  - hostname: rdp.sysadminexplained.uk
    service: rdp://localhost:3389
  # Catch All:
  - service: http_status:404
As shown in the example, fill in your tunnel ID, along with the location to the json file in your .cloudflared folder. For the ingress rule, this example shows an RDP session presented via rdp.sysadminexplained.uk along with a catch all for any unknown traffic to direct to a 404 page.
Save the yaml file and go back to your powershell session. You can now test your tunnel!
.\cloudflared.exe tunnel run mytunnel
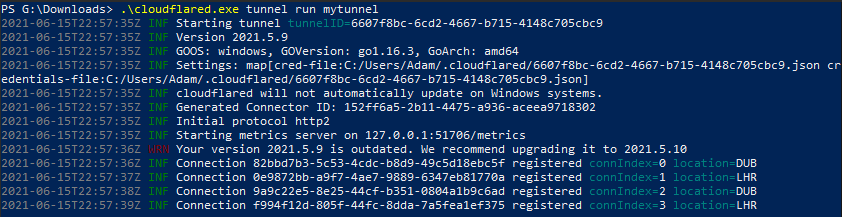
The tunnel is now up and running, with 4 connections to cloudflare, great!
DNS Records
Wait… It doesn’t work, what gives!

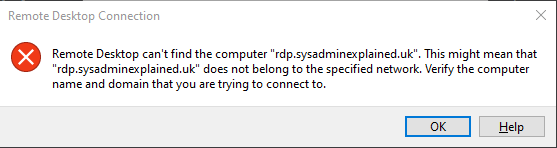
Currently, the tunnel is up and running, but cloudflare is not directing any traffic to the tunnel. This is where DNS records come in. At this point, you have your machine connected to cloudflare, but cloudflare has no idea what traffic to send to your machine, so we need to tell it.
Log into your Cloudflare dashboard (https://dash.cloudflare.com), Select your domain and go to DNS.
Add a new CNAME record using your rdp hostname and use the tunnel ID with .cfargotunnel.com added on the end.

In this case, rdp.sysadminexplained.uk will direct to 6607f8bc-6cd2-4667-b715-4148c705cbc9.cfargotunnel.com which is the mytunnel cloudflared tunnel. Make sure to leave proxying enabled!
Save the record and your DNS is ready to go. But it won’t work yet… RDP sessions are a special case and won’t work until you set up Cloudflare for Teams to proxy the session correctly via cloudflared. Besides… You don’t want a public facing RDP server!
Access Control
Cloudflare for Teams is a service that is bolted on top of the standard Cloudflare lineup and provides application based access control for your services. It acts as a middle man between outside users/devices and your private network behind Cloudflare.
When using RDP sessions, Cloudflare will trigger the cloudflared client on the client machine to connect to cloudflare on your behalf and then initiate the RDP session over this tunnel.
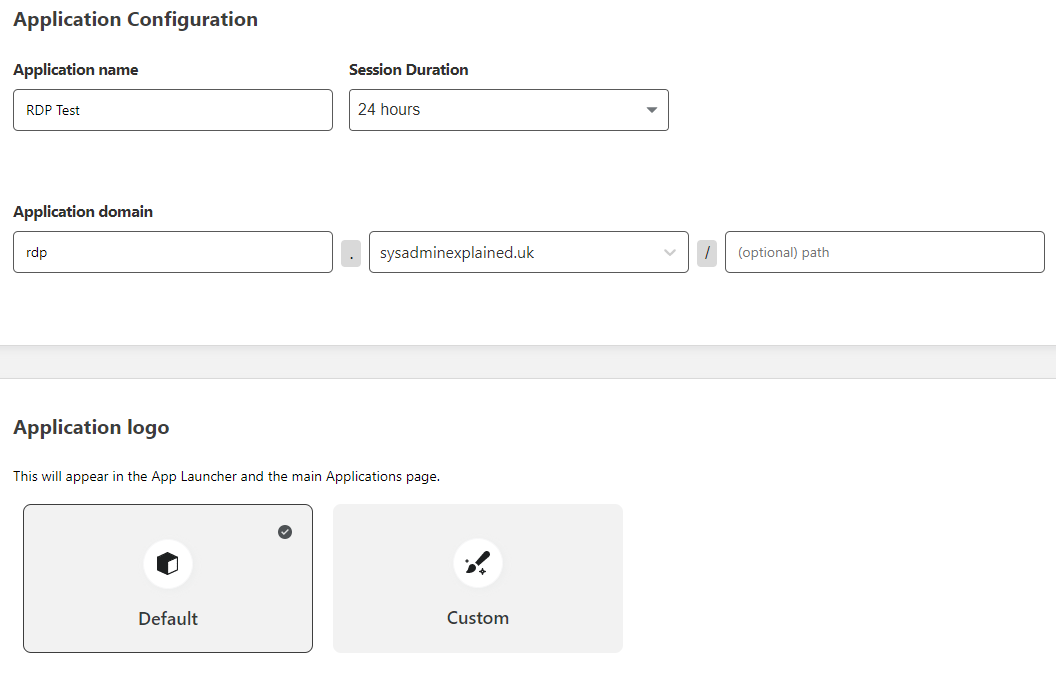
To set this up, open up your Teams dashboard (https://dash.teams.cloudflare.com) and go to Access > Applications and click Add an application.
Choose Self Hosted.

Fill in the information required, Application Name, URL and you can add a logo (optional).
By default, you should have a One-time PIN option for you identity providers, this is just the typical email me a code and enter the code to access. We’ll need to set which emails/devices have access in the next step.
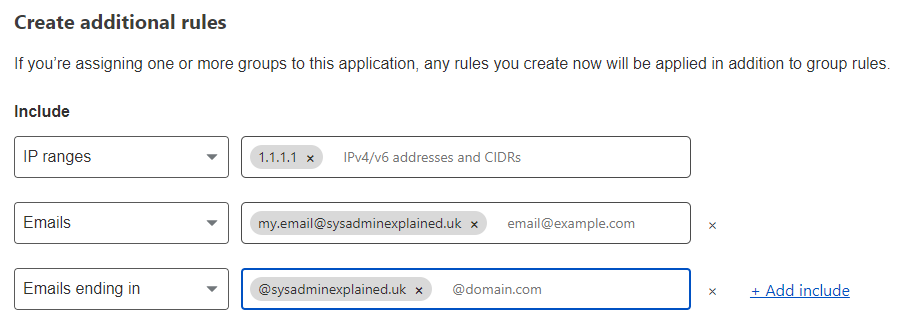
This part is entirely up to you, the above example shows you some ideas for giving access based on specific IPs, emails or domains. Just note that if you want to allow certain IP addresses in, you must set the rule action to bypass which will skip authentication fully for those IP addresses.

On the next page, scroll down to the bottom and enable cloudflared authentication. You also have an option to enable a VNC web rendering session (This doesn’t work with RDP, but if you have VNC running on the server, it may work… I’ve not tested it)
Running as a service
WIP